Last month we covered hatching and this month we’re covering rearing.
Whether you’ve hatched your own or bought some young chicks, here’s how to get them through the next 6 weeks.
1. There are lots of brilliant breeds of chicken who make great broodies and wonderful mothers. If you’ve hatched or bought chicks and you have a broody, you can replace her eggs with chicks and she is very likely to nurture them as though they were her own. This can be handy if you don’t have a cockerel and is a lot less work for you. This is best done at night but be prepared for her to reject them and have a brooder system ready just in case. Keep this little family in a coop away from other flock members until they’re older as they may get pecked by other flock members.

2. If you don’t have a broody, you’re going to need:
- a deep box to keep them in with some kind of cover to keep them safe from pets and predators (cats are very keen on chicks!)
- lots of clean newspaper sheets (scrunched up and laid flat again so it’s not slippery)
- a feeder with anti-scratch design
- a drinker
- chick crumb (consider using one with ACS in it to prevent Coccidiosis)
- marbles or small stones
- a heat lamp or a heat pad/heat plate/electric hen
3. A cardboard box makes a great first home or brooder for chicks, place each sheet of newspaper in a pile so as the top one gets dirty, it can be swiftly removed and leave clean paper underneath with minimal disruption.

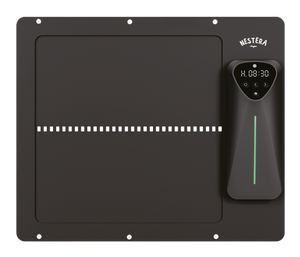
4. Heat pads/heat plates/electric hens are perfect for small numbers of birds. The legs can be raised and lowered to accommodate their growth. They are MUCH more economical and reliable than heat lamps and are much safer too. Heat lamps are a major fire risk. Ensure you set up your brooder and switch your heat lamp on 24 hours before you need to use it. This gives it time to warm up as well as check for any issues.

5. If you have large numbers of chicks or you choose to use a heat lamp, make sure you do the
following:
- Always use a fitting with the bulb guard
- Ideally choose an infra-red ceramic bulb. These give off heat instead heat and light with standard glass bulbs. This can be useful to help birds set their circadian rhythms, reduce feather pecking and maximise body and feather growth.
- Choose the right power for the number you have. Both types of bulb come in a variety of wattages. 100w is fine for smaller groups but if you have 50 or more babies then you will need to be heating a larger area and will need a 250w version.
- Always have a spare bulb available.
- Hang the heat lamp SECURELY, the correct height above the chicks. The temperature on the floor of the box should be around 39°C/102°F. If the chicks are huddled together and cheeping loudly, its too high. If they are hiding in the corners and panting, it’s too low.
- Fit a smoke detector nearby, so in the event, you are alerted as soon as possible.

6. Fill a feeder with FRESH chick crumb, a hopper with an anti-scratch ring is best to stop them climbing in it and flicking it everywhere. Refill regularly.
7. Fill the drinker with FRESH TEPID water and plug any expanse of water with marbles or small stones to prevent chicks drowning. Drinking very cold water can make chicks go into shock. Change the water daily. Dip their beaks in the water when you first add them so they get the idea of what they need to do.

8. As the chicks grow the heat source can be turned off for parts of the day provided the ambient temperature is suitable. An 18”/45cm tall ring of card or hardboard is ideal once they out-grow the box.
9. If you can get hold of small amounts of vaccine from your local Veterinarian, it’s great to try to protect your birds from pathogens. This is easier to do in the US than it is in the UK.


